Vitepress in Vue Project Setup Tutorial
Environment 
- Node.js version 16 or higher.
- Terminal for accessing VitePress via its command line interface (CLI).
- Text Editor with Markdown syntax support.
Dependency 
vitepress: Static site generator for portal's help center.flexsearch: A search engine to search all the text files.vitepress-plugin-search: Integrate flexsearch plugin for vitepress to search docs in the static site.
Workflow 
-
Suppose you are in project root directory, install all of the dependencies:
2. Init the project.npm install -D vitepress flexsearch vitepress-plugin-searchWhen it asks you to input where you would like to initialize, you can input like this:npx vitepress init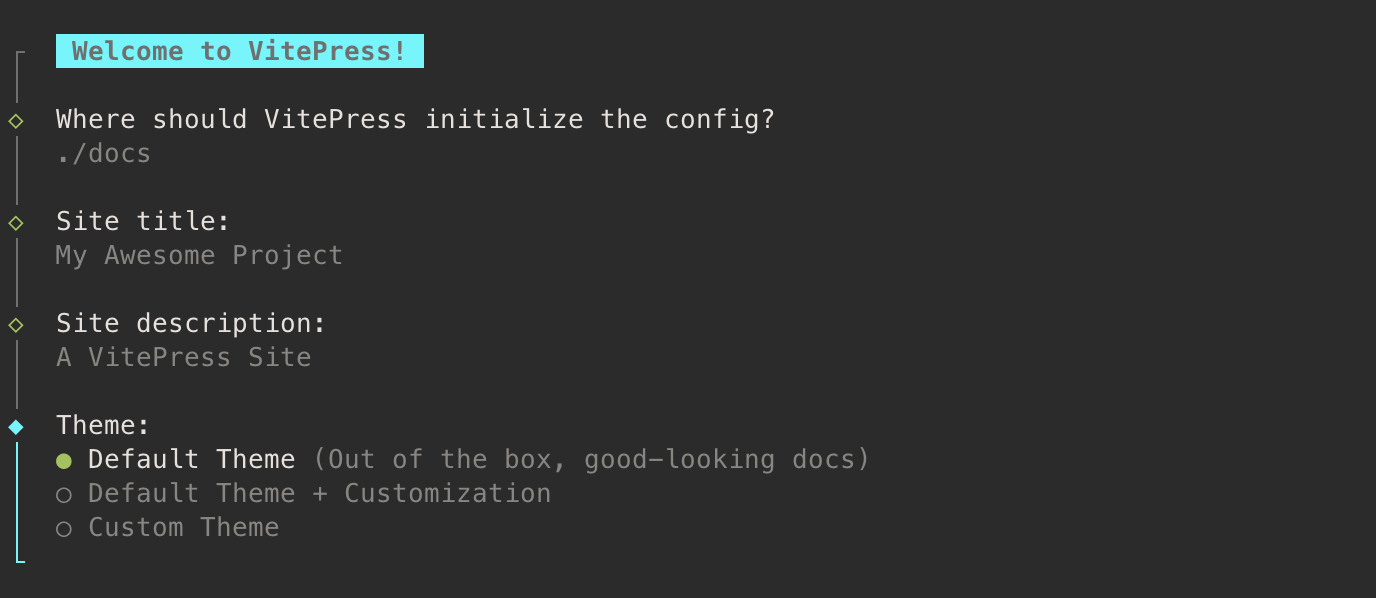
Then the file structures should look like this:
3. Configure vitepress in. ├─ docs │ ├─ .vitepress │ │ └─ config.js │ ├─ api-examples.md │ ├─ markdown-examples.md │ └─ index.md └─ package.jsonconfig.jsin/docs/.vitepress.4. Configure router in// config.js import { defineConfig } from 'vitepress' export default defineConfig({ title: 'UAS Help Center', description: '', lastUpdated: true, base: '/docs/', outDir: '../dist/docs', themeConfig: { logo: '/uas.svg', nav: [], sidebar: [], footer: {}, socialLinks: [] } })index.mdin the root directory.5. Put the static assets like pictures in--- layout: home hero: name: "UAS Help Center" text: "" tagline: Learn UAS knowledge quickly actions: - theme: brand text: Get Started link: /getting-started/how-to-apply-role - theme: alt text: FAQs link: /faqs/frequently-asked-questions features: - title: Alert details: Provide detail information about each alert notification. - title: Match Rule details: Make your hosts and pools be matched and select escalation. - title: Escalation Rule details: Choose the notification type under your tag. ---/publicdirectory. 6. If you need to add plugins to this project, remember to configure them invite.config.jsin the root directory. If not, there is no need to create such a file. The following example shows how to add a search plugin in project.7. Add scripts inimport { SearchPlugin } from 'vitepress-plugin-search' import flexSearchIndexOptions from 'flexsearch' import { defineConfig } from 'vitepress' const options = { ...flexSearchIndexOptions, previewLength: 100, buttonLabel: 'Search', placeholder: '' } export default defineConfig({ plugins: [SearchPlugin(options)] })package.json.8. Build the project files in terminal.{ "script": { "docs:dev": "vitepress dev docs", "docs:build": "vitepress build docs", } }9. Run the project in terminal.npm run docs:buildnpm run docs:dev